Canon Rebel XTi (400D) Instruction Manual: A Comprehensive Guide
This manual provides detailed guidance for the Canon Rebel XTi (400D) digital camera. It covers setup, controls, shooting modes, focusing, and image transfer.
Service manuals and parts lists are available, alongside information on compatible lenses like the EF 35-350mm.
Remote controls offer instant or delayed shutter release, while advanced flash synchronization is also supported.
Welcome to the world of digital SLR photography with the Canon Rebel XTi (also known as the 400D or Kiss Digital X)! This camera, released in 2007, represents a significant step up for aspiring photographers seeking greater control and image quality than point-and-shoot cameras offer. This instruction manual aims to guide you through every aspect of the XTi, from initial setup to mastering advanced techniques.
The Rebel XTi boasts a 10.1-megapixel APS-C CMOS sensor, delivering detailed and vibrant images. Its 9-point autofocus system ensures sharp focus, while a range of shooting modes caters to both beginners and experienced users. Understanding the camera’s features, as detailed in resources like available service manuals, is key to unlocking its full potential.
This guide will explore the camera body, controls, menu system, and various shooting parameters. We’ll delve into focusing modes, ISO settings, white balance, and metering – all crucial elements for achieving optimal results. Furthermore, we’ll cover utilizing the built-in flash, external flash units, and the convenient Live View mode. Whether you’re a novice or looking to refine your skills, this manual will empower you to capture stunning photographs with your Canon Rebel XTi.
Unboxing and Initial Setup
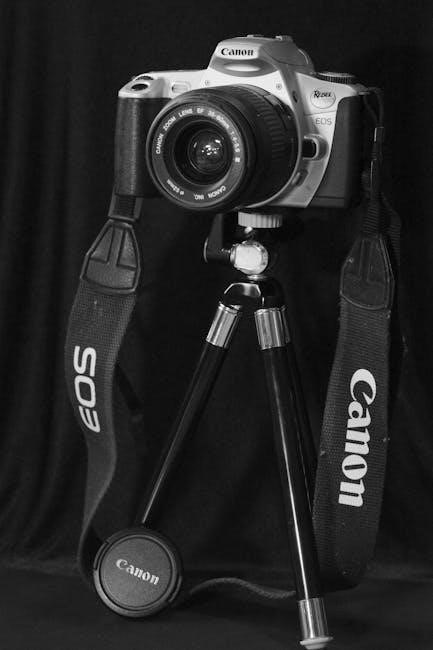
Congratulations on your new Canon Rebel XTi! Let’s begin with unboxing and initial setup. Carefully unpack the camera body, kit lens (typically an 18-55mm), battery, battery charger, neck strap, USB cable, and various manuals. Inspect all components for any damage during shipping.
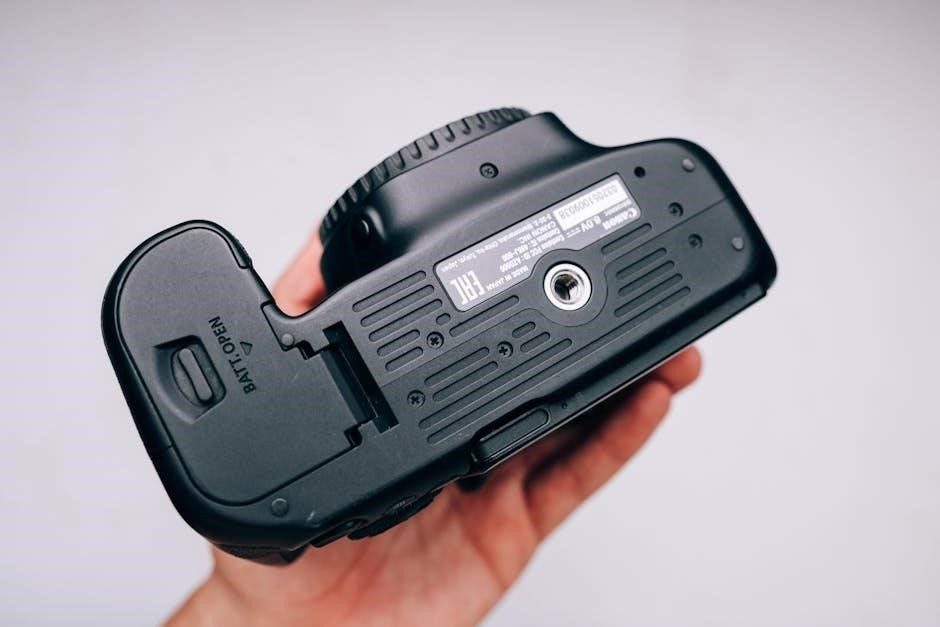
First, charge the battery using the provided charger. This usually takes a few hours. While charging, familiarize yourself with the camera body. Locate the power switch, shutter button, mode dial, and control dials. Insert the charged battery into the battery compartment, ensuring it clicks securely into place.
Next, insert a compatible memory card (CompactFlash Type I) into the memory card slot. Turn on the camera. You’ll be prompted to set the language, date, and time. Follow the on-screen instructions to complete these settings. Ensure the date and time are accurate for proper image organization. Finally, attach the neck strap for secure handling. Refer to the included documentation for detailed diagrams and troubleshooting tips. You are now ready to start shooting!
Understanding the Camera Body and Controls
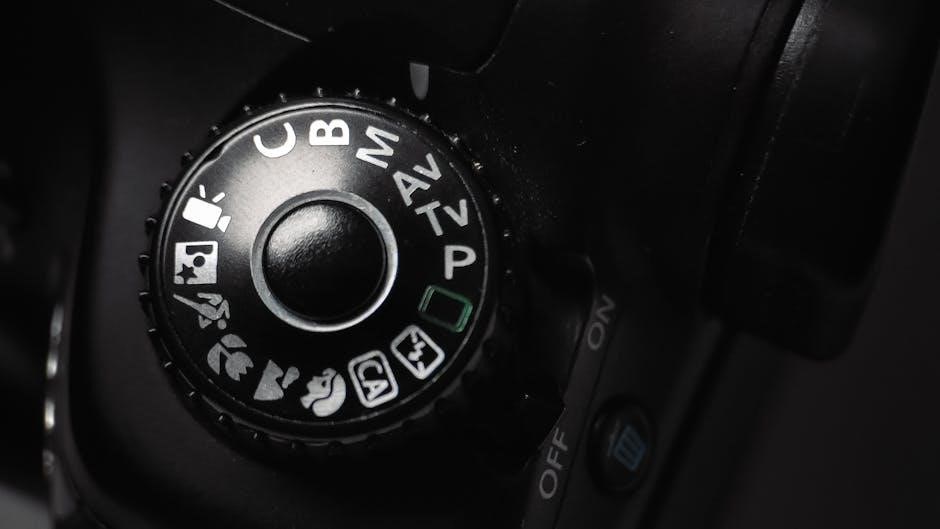
The Canon Rebel XTi features a well-organized layout designed for intuitive operation. The mode dial, located on top, selects shooting modes like Auto, Program, Aperture Priority, Shutter Priority, and Manual. Familiarize yourself with each mode’s function.

The main dial controls settings within selected modes, such as aperture or shutter speed. The four-way controller navigates menus and adjusts settings like ISO and white balance. The SET button confirms selections. The AF point selection buttons allow you to choose the active autofocus point within the 9-point system.
On the rear panel, you’ll find the LCD screen for image review and menu navigation. The playback button accesses images, while the menu button opens the camera’s settings. The Live View button activates Live View shooting. The remote control port allows for external shutter release. Understanding these controls is crucial for mastering your XTi and achieving desired photographic results. Refer to diagrams in the manual for precise locations.
The Menu System: Navigation and Customization
The Canon Rebel XTi’s menu system is accessed via the MENU button on the camera’s back. It’s organized into several tabs, each representing a category of settings: Shooting, AF, Setup, and others. Use the four-way controller to navigate between tabs and options.
Within each tab, you’ll find a range of customizable settings. These include image quality (RAW, JPEG), ISO range, white balance presets, and autofocus modes. The SET button confirms your selections. Explore the ‘Custom Functions’ within the menu to personalize camera behavior to your preferences.
Setup menu options allow you to adjust display settings, date/time, and file naming conventions. Understanding the menu structure is key to unlocking the XTi’s full potential. Don’t hesitate to experiment with different settings to see how they affect your images. Remember to consult the full manual for detailed explanations of each option and its impact on image capture.
Shooting Modes: Auto, Program, Aperture Priority, Shutter Priority, Manual
The Canon Rebel XTi offers a versatile range of shooting modes, selected via the mode dial on the camera’s top. Auto mode simplifies operation, letting the camera handle all settings. Program (P) mode allows some control, like ISO and white balance, while the camera manages aperture and shutter speed.
Aperture Priority (Av) mode lets you set the aperture (f-stop) to control depth of field, with the camera determining the shutter speed. Shutter Priority (Tv) mode allows you to set the shutter speed to freeze or blur motion, while the camera adjusts the aperture.
Manual (M) mode provides full control over both aperture and shutter speed, offering maximum creative flexibility. Experimenting with these modes is crucial for learning photography. Understanding how each setting impacts your images will elevate your skills. The XTi’s shooting modes cater to both beginners and experienced photographers.
Focusing Modes: One-Shot, AI Servo, and Manual Focus
The Canon Rebel XTi provides three primary focusing modes, selectable through the camera’s menu. One-Shot AF is ideal for stationary subjects; the camera focuses when you half-press the shutter button and locks focus until you shoot. This is perfect for landscapes or portraits where the subject isn’t moving.
AI Servo AF (Continuous AF) tracks moving subjects, continuously adjusting focus as they change distance. It’s excellent for sports or wildlife photography. Half-pressing the shutter initiates tracking, and the camera maintains focus while the button is held.
Manual Focus (MF) allows you to precisely control focus using the lens focusing ring. This is useful in low light or when the autofocus system struggles. The XTi’s 9-point autofocus system works in conjunction with these modes. Mastering these focusing options is key to capturing sharp, well-focused images in various scenarios.
Understanding ISO Settings and Image Quality
ISO settings control your Canon Rebel XTi’s sensitivity to light. Lower ISO values (like 100 or 200) produce cleaner images with less noise, ideal for bright conditions. However, they require more light. Higher ISO settings (like 800, 1600, or 3200) allow shooting in darker environments, but introduce more digital noise – graininess that can reduce image clarity.
The XTi’s image quality is directly affected by ISO choice. While higher ISOs enable shooting in low light, carefully consider the trade-off between brightness and noise. Experiment to find the highest usable ISO for your needs.
Understanding the relationship between ISO, aperture, and shutter speed is crucial. Increasing ISO allows for faster shutter speeds or smaller apertures in low light, but always prioritize the lowest ISO possible to maintain optimal image quality. The camera’s image width is 3888 pixels and height is 2592 pixels.
White Balance: Achieving Accurate Colors
White balance (WB) ensures colors are rendered accurately in your photos, compensating for different lighting conditions. The Canon Rebel XTi offers several preset WB modes, including Auto, Daylight, Cloudy, Shade, Tungsten, and Fluorescent. Auto WB generally performs well, but can sometimes be inaccurate.
For precise color, use a custom white balance. This involves pointing the camera at a white or gray card under the current lighting and telling the camera to use that as a reference. This is particularly useful in challenging lighting situations where Auto WB struggles.

Incorrect white balance results in color casts – images appearing too warm (yellowish/reddish) or too cool (bluish). Experiment with the presets and custom WB to achieve natural-looking colors. Understanding WB is vital for consistent and pleasing results, especially when shooting in RAW format for greater post-processing flexibility.
Metering Modes: Evaluative, Partial, and Spot Metering
The Canon Rebel XTi utilizes three metering modes to determine optimal exposure: Evaluative, Partial, and Spot. Evaluative metering (the default) analyzes the entire scene, assessing brightness levels across the frame to calculate exposure. It’s versatile and works well in most situations.
Partial metering measures light from a smaller area in the center of the frame (approximately 6.5% of the area). This is useful when the subject is backlit or has strong contrast, preventing the camera from being fooled by bright surroundings.

Spot metering measures light from an even smaller area (approximately 2.8% of the frame), providing the most precise reading for a specific point. This is ideal for challenging lighting scenarios where accurate exposure of a small subject is crucial. Understanding these modes allows you to override the camera’s automatic settings and achieve properly exposed images in diverse conditions.
Using the Built-in Flash and External Flash Units
The Canon Rebel XTi features a built-in flash, useful for adding light in low-light situations or filling shadows. Flash settings, accessible through the menu, include Auto, Manual, and Flash Off. Auto mode lets the camera decide when to fire the flash. Manual allows you to control flash power.
For more advanced lighting, the XTi supports external flash units. Utilizing the hot shoe, these units offer greater power, control, and creative possibilities. The AF50 remote, compatible with the XTi, enables wireless TTL flash synchronization, allowing for off-camera flash setups and multiple flash configurations.
Through-the-lens (TTL) metering ensures accurate flash exposure. Experimenting with flash modes and external units unlocks a wider range of photographic styles, from subtle fill light to dramatic effects. Remember to consider bounce flash techniques for softer, more natural-looking illumination.
Working with Live View Mode

Live View mode on the Canon Rebel XTi allows you to compose and review images on the camera’s LCD screen, as if looking through the viewfinder. This is particularly useful for precise composition, macro photography, or shooting from awkward angles where using the viewfinder is difficult.
To activate Live View, press the Live View button on the back of the camera. The mirror flips up, and the image is displayed on the LCD. Be aware that prolonged Live View use can lead to sensor heating, potentially affecting image quality. The camera may automatically shut off Live View after a certain period to prevent overheating.
Within Live View, you can utilize features like grid display for composition assistance and magnification for critical focusing. Focus is achieved using contrast detection, which can be slower than the standard autofocus system. Experiment with Live View to discover its benefits for various shooting scenarios.
Understanding Image Stabilization (IS)
Image Stabilization (IS) is a crucial feature for achieving sharp images, especially in low-light conditions or when using longer focal length lenses. The Canon Rebel XTi benefits from IS technology when paired with compatible lenses that incorporate this functionality.
IS works by compensating for camera shake, reducing blur caused by hand movements during exposure. This allows you to shoot at slower shutter speeds than would otherwise be possible, expanding your creative options. Different lenses may offer varying IS modes, such as a standard mode for general shooting and a panning mode for tracking moving subjects.
When using an IS lens, ensure the IS switch is set to the ‘ON’ position. The effectiveness of IS depends on the amount of camera shake; it won’t freeze motion of the subject itself. Remember to turn IS off when using a tripod, as it can sometimes introduce unwanted blur in this situation.
Using the Remote Control
The Canon Rebel XTi is compatible with the RC-1 remote control, offering convenient hands-free operation for various shooting scenarios. This is particularly useful for self-portraits, group photos, or when minimizing camera shake during long exposures.
The RC-1 remote provides two distinct modes of operation. The first is ‘instant release,’ where pressing the button on the remote immediately triggers the shutter; The second is a ‘two-second delay’ mode, allowing you to position yourself in the frame before the picture is taken, eliminating camera shake caused by pressing the shutter button directly.
To use the remote, insert batteries and point it towards the infrared receiver located on the front of the camera. Ensure there are no obstructions between the remote and the camera. Selecting the desired mode is done via a switch on the remote itself. Proper use of the remote enhances stability and expands photographic possibilities.

Navigating the Playback Mode
The Playback mode on your Canon Rebel XTi allows you to review captured images and videos. Access it by pressing the dedicated playback button (marked with a triangle and a play symbol) on the camera’s back panel. This instantly displays the most recently taken photograph.
Within Playback mode, you can navigate through your images using the directional buttons on the electronic dial. Pressing the zoom button (+) magnifies the image for detailed inspection, allowing you to check focus and sharpness. Pressing the zoom button (-) returns to a normal view.

Additional functions are available, including displaying shooting information (histogram, aperture, shutter speed), rotating images, and creating slideshows. The ‘Menu’ button within Playback mode provides access to options for deleting images, protecting them from accidental deletion, and setting display preferences. Careful review in Playback mode is crucial for assessing image quality and identifying potential issues.
Deleting and Protecting Images
Deleting images on your Canon Rebel XTi is straightforward within Playback mode. First, select the image you wish to remove using the directional buttons. Press the ‘Menu’ button, then navigate to the delete option (typically represented by a trash can icon). You’ll be prompted to confirm the deletion – choose ‘Yes’ to permanently erase the image.
Protecting images prevents accidental deletion. Select the image in Playback mode, press ‘Menu’, and choose the protect option (often a key or lock symbol). A key icon will appear on the image thumbnail, indicating it’s protected. To unprotect, repeat the process.
Bulk deletion is also possible. Select multiple images using the directional buttons, then follow the deletion procedure. Be cautious when deleting multiple images, as this action is irreversible. Regularly reviewing and deleting unwanted photos frees up valuable space on your memory card, ensuring you can continue capturing memories.
Transferring Images to a Computer
Transferring images from your Canon Rebel XTi to a computer is typically done in one of two ways: via a USB cable or by removing the memory card and using a card reader. Using the USB cable, connect the camera to an active USB port on your computer. The camera will usually appear as a removable drive;
Once recognized, you can browse the DCIM folder (where your photos are stored) and copy the images to your desired location on your computer. Alternatively, a card reader offers faster transfer speeds. Simply insert the memory card into the reader, which connects to your computer via USB.
Software like Canon’s ImageBrowser or Digital Photo Professional can also assist with image management and transfer. Ensure your computer has the necessary drivers installed for proper communication with the camera or card reader. Regularly backing up your images to a computer or external hard drive is crucial for safeguarding your precious memories.
Understanding the Canon Rebel XTi’s Autofocus System (9-Point AF)
The Canon Rebel XTi features a 9-point autofocus (AF) system, meaning it utilizes nine distinct sensors to detect and lock focus on your subject. These points are arranged in a cross-pattern across the center of the frame, offering versatile coverage.
AF point selection can be automatic, allowing the camera to choose the best point, or manual, giving you control over which point is active. Manual selection is useful for precise focusing on specific areas of the scene. The AF system works in conjunction with focusing modes like One-Shot for static subjects and AI Servo for tracking moving subjects.
Understanding the AF points and how they interact with your chosen focusing mode is key to achieving sharp images; The central AF point is generally the most sensitive. Experimenting with different AF point configurations and modes will help you master the XTi’s autofocus capabilities and consistently capture clear, well-focused photographs.
Compatible Lenses: Canon EF and EF-S
The Canon Rebel XTi utilizes the Canon EF and EF-S lens mounts, offering a vast selection of compatible lenses. EF lenses are designed for full-frame cameras but are fully compatible with the XTi’s APS-C sensor. EF-S lenses, however, are specifically designed for cameras with APS-C sized sensors like the XTi, offering a more compact and affordable option.
EF lenses generally provide a wider field of view on the XTi due to the crop factor. Popular choices include the EF 35-350mm f/3.5-5.6L, and the EF 28-80mm f/2.8-4L USM, known for their image quality.
EF-S lenses are optimized for the XTi’s sensor size, providing a more natural field of view. When selecting a lens, consider your photographic needs – wide-angle, telephoto, or standard zoom – and choose accordingly. Canon’s extensive lens lineup ensures there’s an option for every shooting scenario.

Troubleshooting Common Issues
Encountering problems with your Canon Rebel XTi? Several common issues have straightforward solutions. If the camera won’t turn on, ensure the battery is fully charged and correctly inserted. Check the memory card for write-protection, which can prevent saving images.
Focusing difficulties can often be resolved by switching focusing modes – One-Shot for stationary subjects, AI Servo for moving ones. Ensure sufficient light for the autofocus system to function effectively. If images appear blurry, verify proper technique and consider using image stabilization (IS) lenses.
Error messages on the LCD screen usually indicate a specific problem. Consult the camera’s menu or Canon’s support website for detailed explanations and troubleshooting steps. Regularly cleaning the sensor and lens can prevent dust-related issues. Remember to consult the service manual for more in-depth repairs if needed.
Canon Rebel XTi Specifications and Technical Details
The Canon Rebel XTi (400D) features a 10.1-megapixel APS-C CMOS sensor, delivering images with a maximum resolution of 3888 x 2592 pixels. It boasts a 9-point autofocus system for accurate subject tracking. The camera’s ISO range extends from 100 to 1600, expandable to 3200 for low-light conditions.
Its shutter speed ranges from 30 seconds to 1/4000th of a second, offering versatility in various shooting scenarios. The XTi supports continuous shooting at up to 3 frames per second. It utilizes an SD memory card slot for storage.
Connectivity options include USB 2.0 and mini-HDMI. The camera body measures approximately 139.5 x 94.2 x 64.1 mm and weighs around 510g (body only). Compatible lenses include Canon EF and EF-S mounts, providing a wide range of photographic possibilities. The camera is powered by a Canon LP-E5 battery.