Paint Your Own Cookie (PYO) is a fun and creative activity that allows you to personalize cookies with colorful icing and designs, making it a delightful treat for all ages․
1․1 What is Paint Your Own Cookie (PYO)?
Paint Your Own Cookie (PYO) is a creative activity where pre-baked cookies are provided with icing and tools, allowing individuals to design and decorate their own edible masterpieces․ It’s a fun, interactive treat perfect for parties, holidays, or personal enjoyment, encouraging artistic expression and delicious results․
1․2 Benefits of Painting Your Own Cookies
Painting your own cookies offers a fun, creative outlet, fostering imagination and relaxation․ It’s an engaging activity for kids and adults alike, promoting fine motor skills and self-expression while producing personalized, delicious treats that make special gifts or memorable events․
Materials and Supplies Needed
Gather essential items like sugar cookie dough, royal icing, food-grade paints, piping bags, tips, stencils, and tools for a smooth and creative decorating experience․
2․1 Essential Ingredients for Cookie Dough
The basic ingredients for sugar cookie dough include all-purpose flour, baking powder, unsalted butter, granulated sugar, eggs, vanilla extract, and salt․ These components ensure a soft, chewy texture and a flavorful base for decorating․
2․2 Types of Icing for Decorating
Common icings for cookies include royal icing, known for its smooth, durable finish, and buttercream, which offers a sweeter, creamier texture․ Royal icing is ideal for detailed designs, while buttercream is great for spreading and layering colors creatively․
2․3 Tools for Painting and Decorating
Essential tools include small paintbrushes for intricate details, piping bags with various tips for outlining and flooding, and stencils for precise designs․ Additionally, scraper tools and toothpicks are useful for creating patterns and textures on the icing, enhancing the overall creativity of your cookie designs․
Preparing the Cookies
Bake sugar cookies to perfection, ensuring they are firm and ready for decorating․ Prepare royal icing for a smooth base, and allow adequate drying time before painting begins․
3․1 Baking the Perfect Sugar Cookies
Bake sugar cookies to perfection by rolling out dough to 1/4-inch thickness and cutting into desired shapes․ Bake at 350°F for 8-10 minutes until edges are lightly golden․ Allow cookies to cool completely on a wire rack before decorating to ensure a firm surface for painting and icing․
3․2 Preparing Royal Icing for Decorating
Combine 2 cups powdered sugar, 2-3 tablespoons egg whites or substitutes, and a pinch of salt․ Mix until smooth, adding flavorings like vanilla if desired․ Adjust consistency with water for outlining or flooding․ Sift sugar to avoid lumps for a professional finish, ensuring icing is ready for creative decorating․
3․3 Drying Time for Icing and Paint
Drying time varies based on icing consistency and environmental conditions․ Thin icing dries faster, typically within 30 minutes to an hour, while thicker layers may take 2-4 hours․ Painted details require at least 24 hours to fully set․ Ensure cookies dry completely in a cool, dry place before handling or storing․
Decorating Techniques
Explore creative methods to enhance your cookies with intricate designs, from outlining to detailed piping, ensuring each cookie reflects your unique style and artistic vision․
4․1 Outlining and Flooding the Cookie
Start by outlining your cookie with a thin layer of icing to define its shape and details․ Next, flood the interior with a thicker icing, spreading evenly to cover the surface․ Allow the base layer to dry completely before adding finer details or additional designs for a polished look․
4․2 Using Stencils for Detailed Designs
Place a food-grade stencil on the cookie and spread a thin, even layer of royal icing over the design․ Use a scraper or spatula to ensure coverage․ Allow the icing to dry completely before carefully removing the stencil, revealing crisp, professional-looking patterns and designs on your cookie․
4․3 Adding Fine Details with Piping
Use a piping bag with fine tips to add intricate details like lines, borders, or small shapes․ Royal icing consistency is key—thicker for outlining, thinner for flooding․ Practice steady hand movements and allow each layer to dry before adding more details for crisp, professional results on your painted cookies․
Tips for Achieving Professional Results
For polished cookies, use thin, consistent icing layers, vibrant food-grade paints, and patience․ Allow each layer to dry fully before adding details for a professional, long-lasting finish․
5․1 Choosing the Right Consistency of Icing
For outlining, use thick icing; for flooding, opt for thin consistency․ Adjust by adding powdered sugar or water․ Proper consistency ensures smooth coverage and crisp details, enhancing your cookie’s appearance and durability for professional results․
5․2 Using Food-Grade Paints Safely
Always use food-grade paints specifically designed for edible creations․ Follow the manufacturer’s instructions and apply thin layers to avoid overpowering the cookie’s flavor․ Ensure paints are free from toxins and suitable for consumption, especially for children, to maintain safety and enjoy a worry-free decorating experience․
5․3 Storing and Freezing Decorated Cookies
Store decorated cookies in an airtight container at room temperature for up to 3 days․ For longer storage, freeze cookies in a single layer in an airtight container․ Let frozen cookies thaw at room temperature to preserve icing details and texture, ensuring they remain fresh and visually appealing․
Creative Ideas for Custom Designs
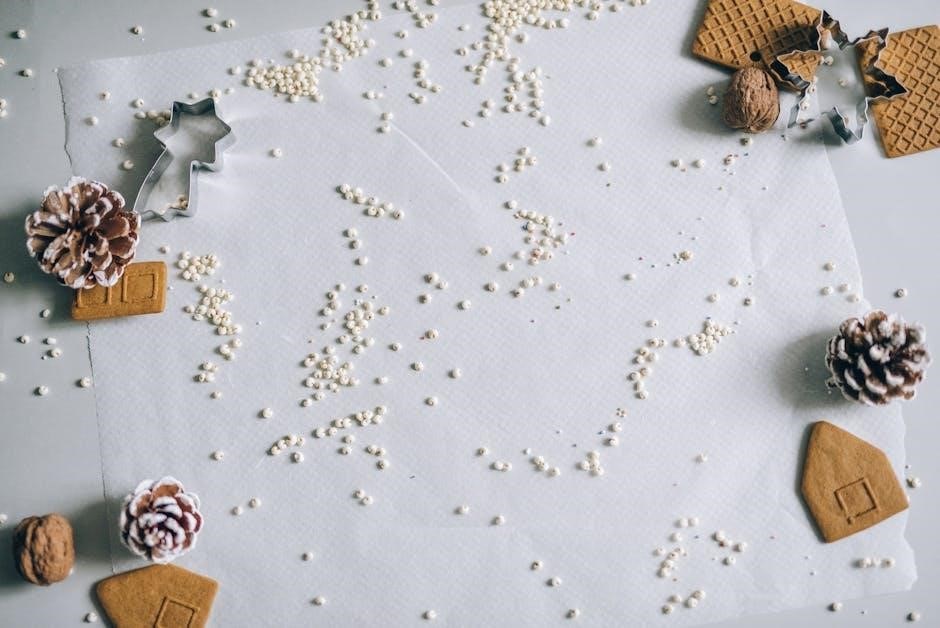
Explore vibrant patterns, seasonal themes, and personalized messages․ Combine paint with sprinkles or edible glitter for textured effects․ Use stencils or fine piping for intricate details, creating unique designs that stand out․
6․1 Seasonal and Holiday-Themed Cookies
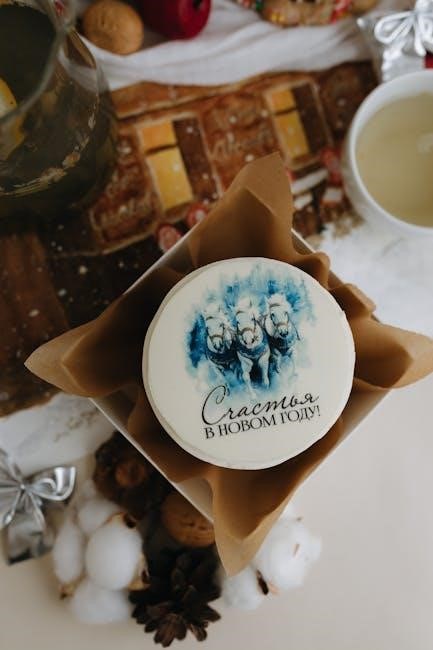
Transform your cookies into festive treats by using seasonal themes․ For Christmas, paint snowflakes or Santa hats․ At Easter, add bunnies or eggs․ Halloween cookies can feature spooky faces or bats․ Seasonal designs make your creations perfect for holiday gatherings and gift-giving, adding a personal touch to celebrations․
6;2 Personalizing Cookies with Names or Messages
Add a personal touch by painting names, initials, or heartfelt messages on your cookies․ Use royal icing in contrasting colors for clarity and style․ This makes each cookie unique and special, perfect for birthdays, weddings, or as personalized gifts, creating memorable treats for loved ones․
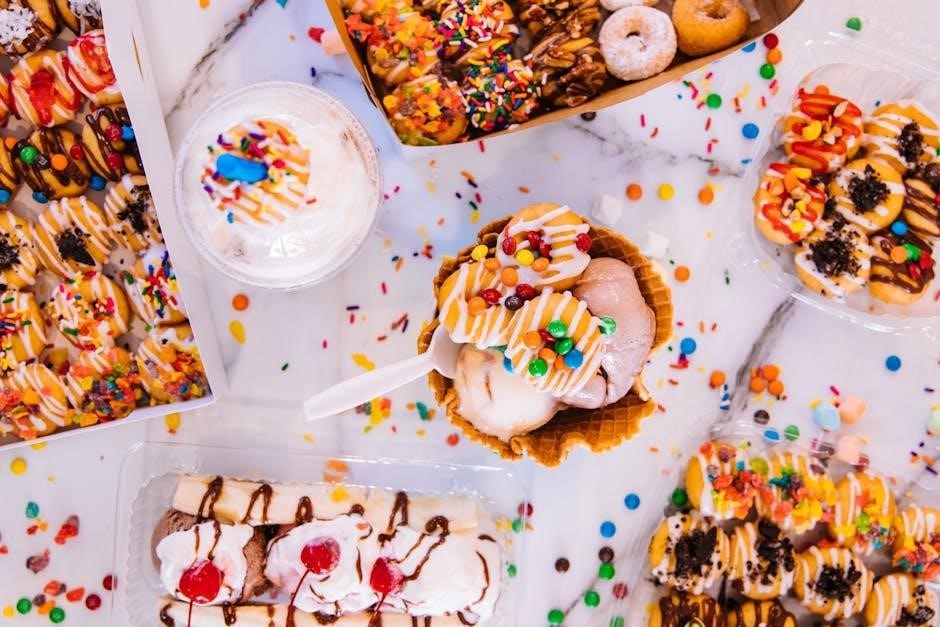
6․3 Combining Paint and Sprinkles for Texture
Enhance your cookies by blending paint and sprinkles for added texture․ Apply paint first, then sprinkle while icing is wet․ This technique creates vibrant, dimensional designs, making each cookie visually appealing and fun to eat, perfect for celebrations or gifts․
Safety and Best Practices
Ensure all materials are food-grade and stored properly․ Wash hands before handling dough or icing, and avoid cross-contamination to maintain hygiene and safety standards while decorating․
7․1 Ensuring Food Safety While Painting
Use only food-grade paints and icings to avoid harmful chemicals․ Wash hands thoroughly before handling cookies and ensure all tools are clean․ Store decorated cookies in airtight containers to maintain freshness and prevent contamination, following proper food safety guidelines for edible creations․
7․2 Allergy Considerations for Ingredients
Always check ingredients for common allergens like gluten, dairy, and nuts․ Use allergen-free alternatives when possible․ Clearly label cookies with ingredient lists to inform consumers, especially those with dietary restrictions, ensuring safe consumption for everyone involved in your Paint Your Own Cookie activities․
7․3 Cleaning and Maintaining Tools
Wash tools with mild soap and warm water, then dry thoroughly to prevent rust․ Sanitize with vinegar or food-safe sanitizer․ Store tools in a dry place to maintain quality․ Regularly inspect and replace worn or damaged items, ensuring your Paint Your Own Cookie tools remain clean, safe, and functional for future use․
DIY Paint Your Own Cookie Kits
DIY Paint Your Own Cookie Kits offer a convenient way to create custom treats at home, including pre-baked cookies, icing, and food-safe paints for endless creativity․
8․1 Creating a Homemade PYO Kit
A homemade PYO kit can be easily assembled with pre-baked cookies, royal icing, food-grade paints, and decorative tools․ Include stencils and tips for customization, ensuring a fun and creative experience for all skill levels and ages, perfect for gifting or personal enjoyment․
8․2 Packaging Tips for Gift-Giving
Package your PYO kit in a sturdy box or clear bag to showcase contents․ Add decorative elements like ribbons or gift tags․ Include a set of brushes, stencils, and instructions for a complete, thoughtful gift․ Ensure all items are securely packed to prevent damage during transit․
8․3 Budget-Friendly Alternatives for Supplies
Use store-bought icing instead of royal icing for cost savings․ Opt for basic cookie cutters and simple tools like toothpicks for details; Shop for discounted food coloring or edible paints․ Repurpose household items like sponges or stamps for creative textures, making your PYO kit affordable without compromising quality․
Hosting a Paint Your Own Cookie Party
Plan a fun and engaging event with pre-baked cookies, icing, and tools․ Organize activities to keep guests entertained and ensure a smooth, enjoyable decorating session for all․
9․1 Planning and Preparing for the Event
Start by creating a guest list and theme, then send out invitations․ Prepare by baking and storing cookies, mixing icing colors, and organizing decorating tools․ Plan a timeline for setup, decorating, and drying times to ensure a smooth and enjoyable experience for all participants․
9․2 Activities and Games to Keep Kids Engaged
Organize cookie-decorating contests, scavenger hunts for ingredients, and themed design challenges․ Introduce games like “Guess the Cookie Topping” or “Cookie Story Time” to keep children entertained․ These activities foster creativity and teamwork, making the event enjoyable and memorable for everyone involved․
9․3 Tips for Managing a Group Decorating Session
Prepare stations with pre-baked cookies and supplies․ Assign roles like icing helper or decorator․ Use timers to keep activities on track․ Encourage creativity while demonstrating techniques․ Have wipes ready for spills and smocks for protection․ Rotate tasks to ensure everyone gets a turn and stays engaged․

Showcasing Your Finished Creations
Display your painted cookies in jars or on tiered stands for a visually appealing presentation․ Photograph them with good lighting and share online for inspiration and admiration․
10․1 Photographing Your Cookies for Social Media
Use natural light to capture vibrant colors and details․ Experiment with angles and styling props like ribbons or greenery․ Edit photos with filters or apps to enhance appeal before sharing your creations online․
10․2 Displaying Cookies in Creative Ways
Showcase your painted cookies in decorative jars, stands, or plates․ Add ribbons, fresh flowers, or greenery for a festive touch․ Arrange cookies in patterns or themes to create visually appealing displays that highlight your artistic skills and add charm to any setting․
10․3 Sharing Your Designs for Inspiration
Share your painted cookie creations on social media platforms like Instagram and Pinterest․ Use hashtags to connect with other cookie artists and inspire others․ Post step-by-step tutorials or before-and-after photos to showcase your process and final results, fostering a community of creativity and shared passion for cookie decorating․